
Series
썸네일 이미지 출처 : 5 Steps to Hosting Your Application on Amazon Cloud Container Service
3부
이전 장에서 ECS 배포를 완료하였습니다. 이번 장엔 GitHub의 소스 코드 리포지토리에서 GitHub Actions를 사용하여 Amazon ECS에 배포된 애플리케이션을 위한 CI/CD 파이프라인을 구축하는 방법을 살펴보겠습니다.
WorkFlow
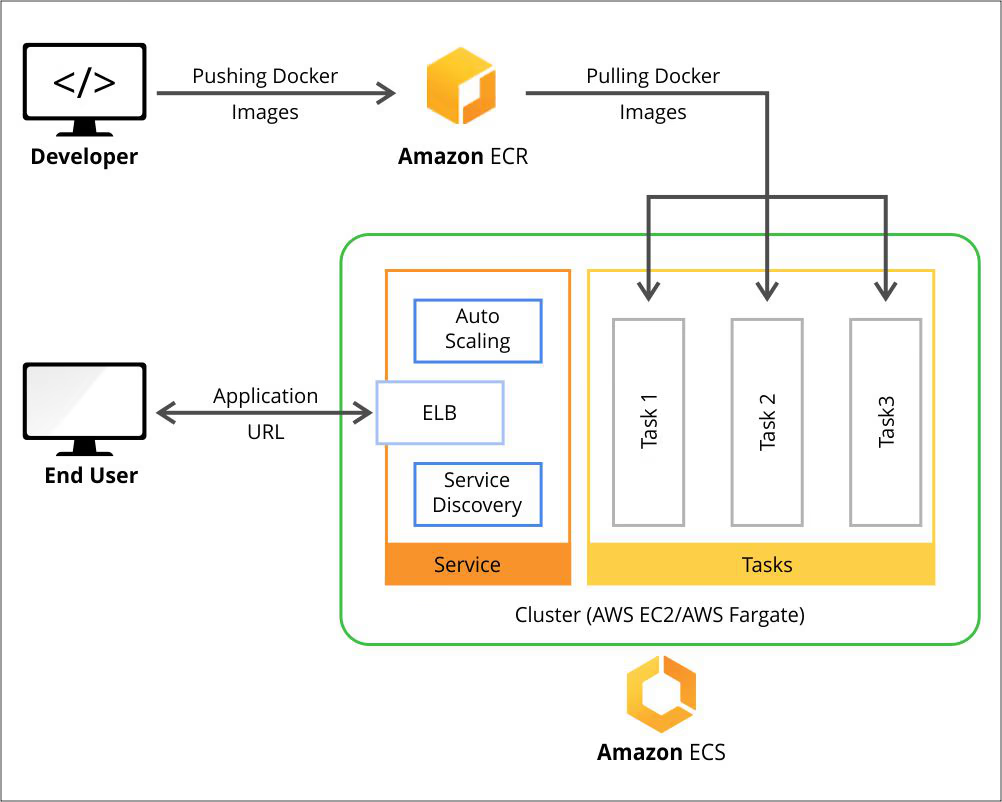
워크플로는 다음과 같습니다.
](/images/aws_ecs/Untitled%2085.png)
출처 : Github Actions + ECR + ECS
](/images/aws_ecs/Untitled%2086.png)
출처 : Best Practices - Running your application with Amazon ECS
GitHub를 소스 코드 리포지토리로 사용하는 경우 GitHub Actions는 모든 GitHub 이벤트에서 워크플로를 시작하여 직접 구현할 경우 매우 복잡한 CI/CD 기능을 간단하게 구현하는 방법을 제공합니다.
GitHub Actions은 특정 GitHub 이벤트(예: 풀, 푸시 또는 커밋)에 대한 응답으로 트리거되는 워크플로를 만들기 위해 다른 GitHub 작업과 결합할 수 있는 개별 기능 단위입니다. 워크플로는 GitHub 호스팅 서버의 관리 환경 내에서 실행됩니다.
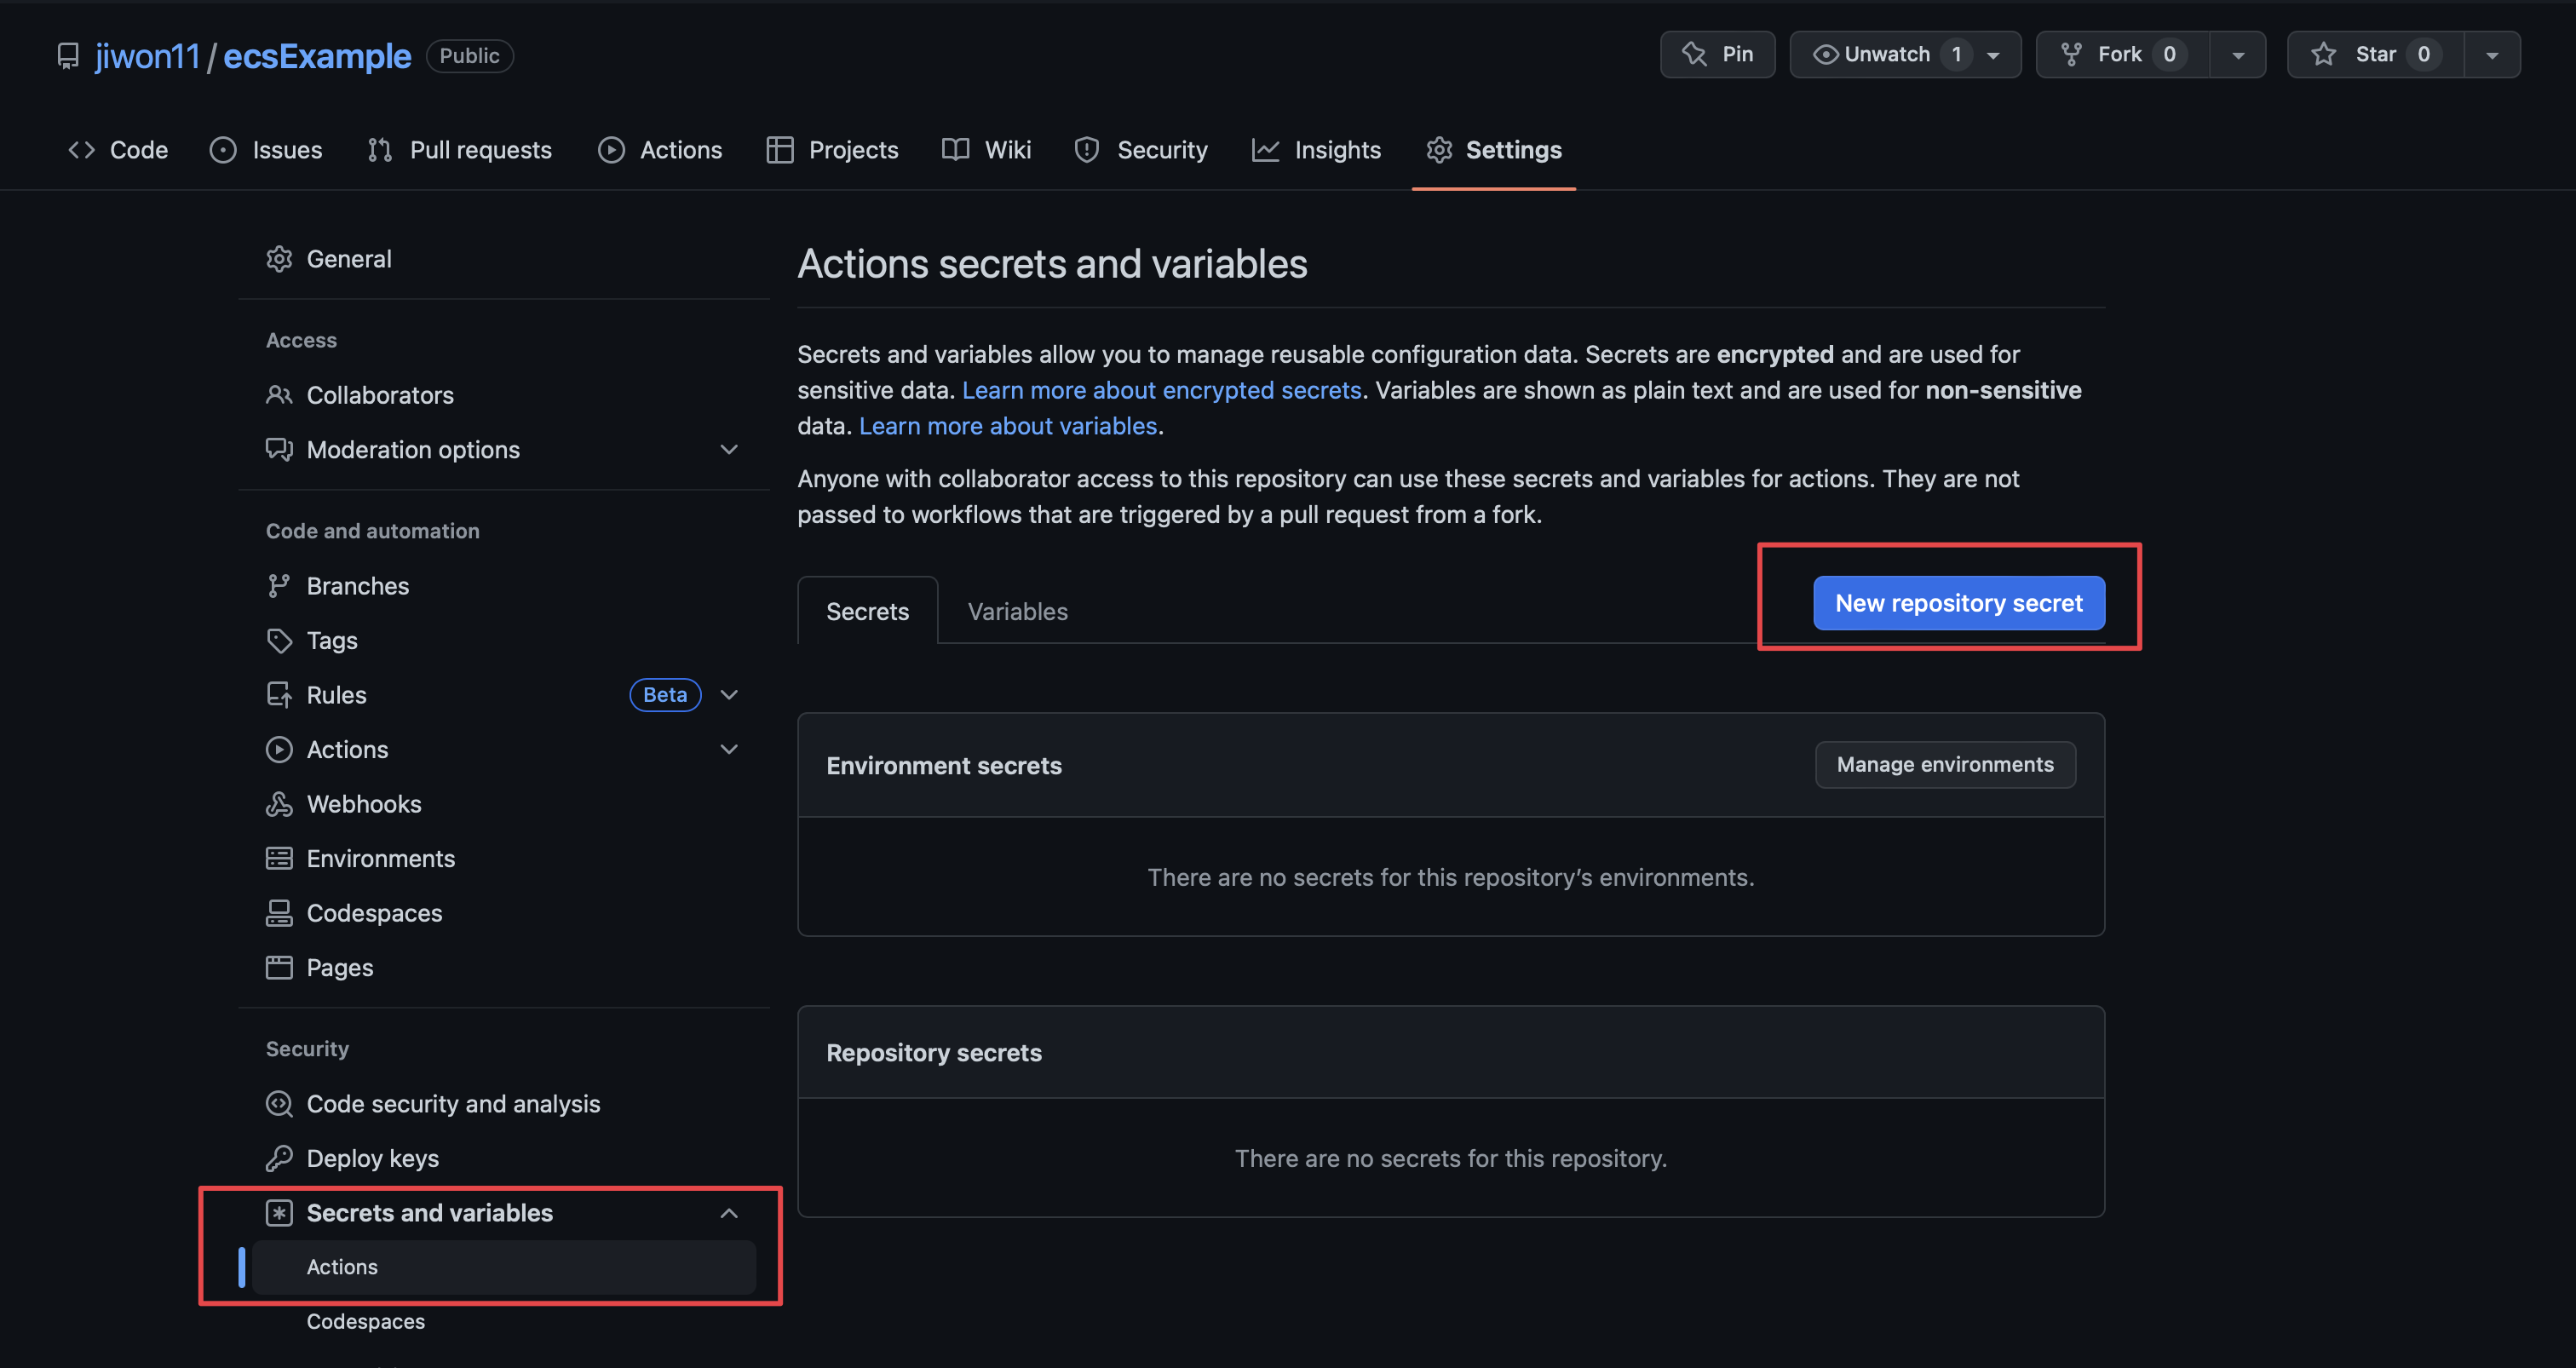
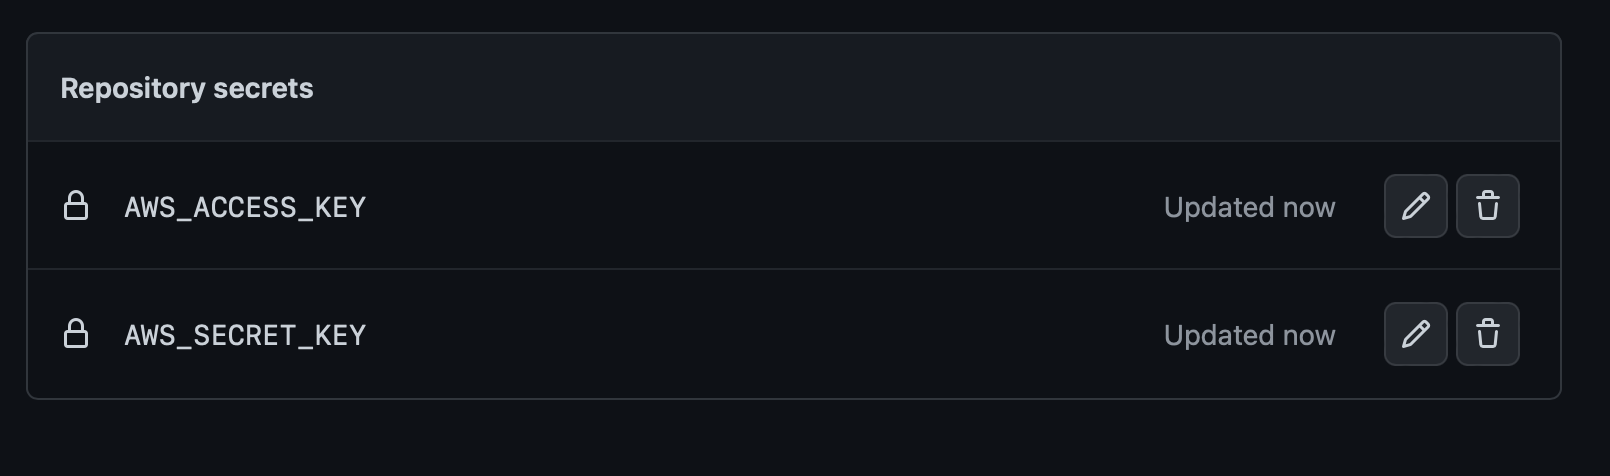
Github Actions Secrets 설정
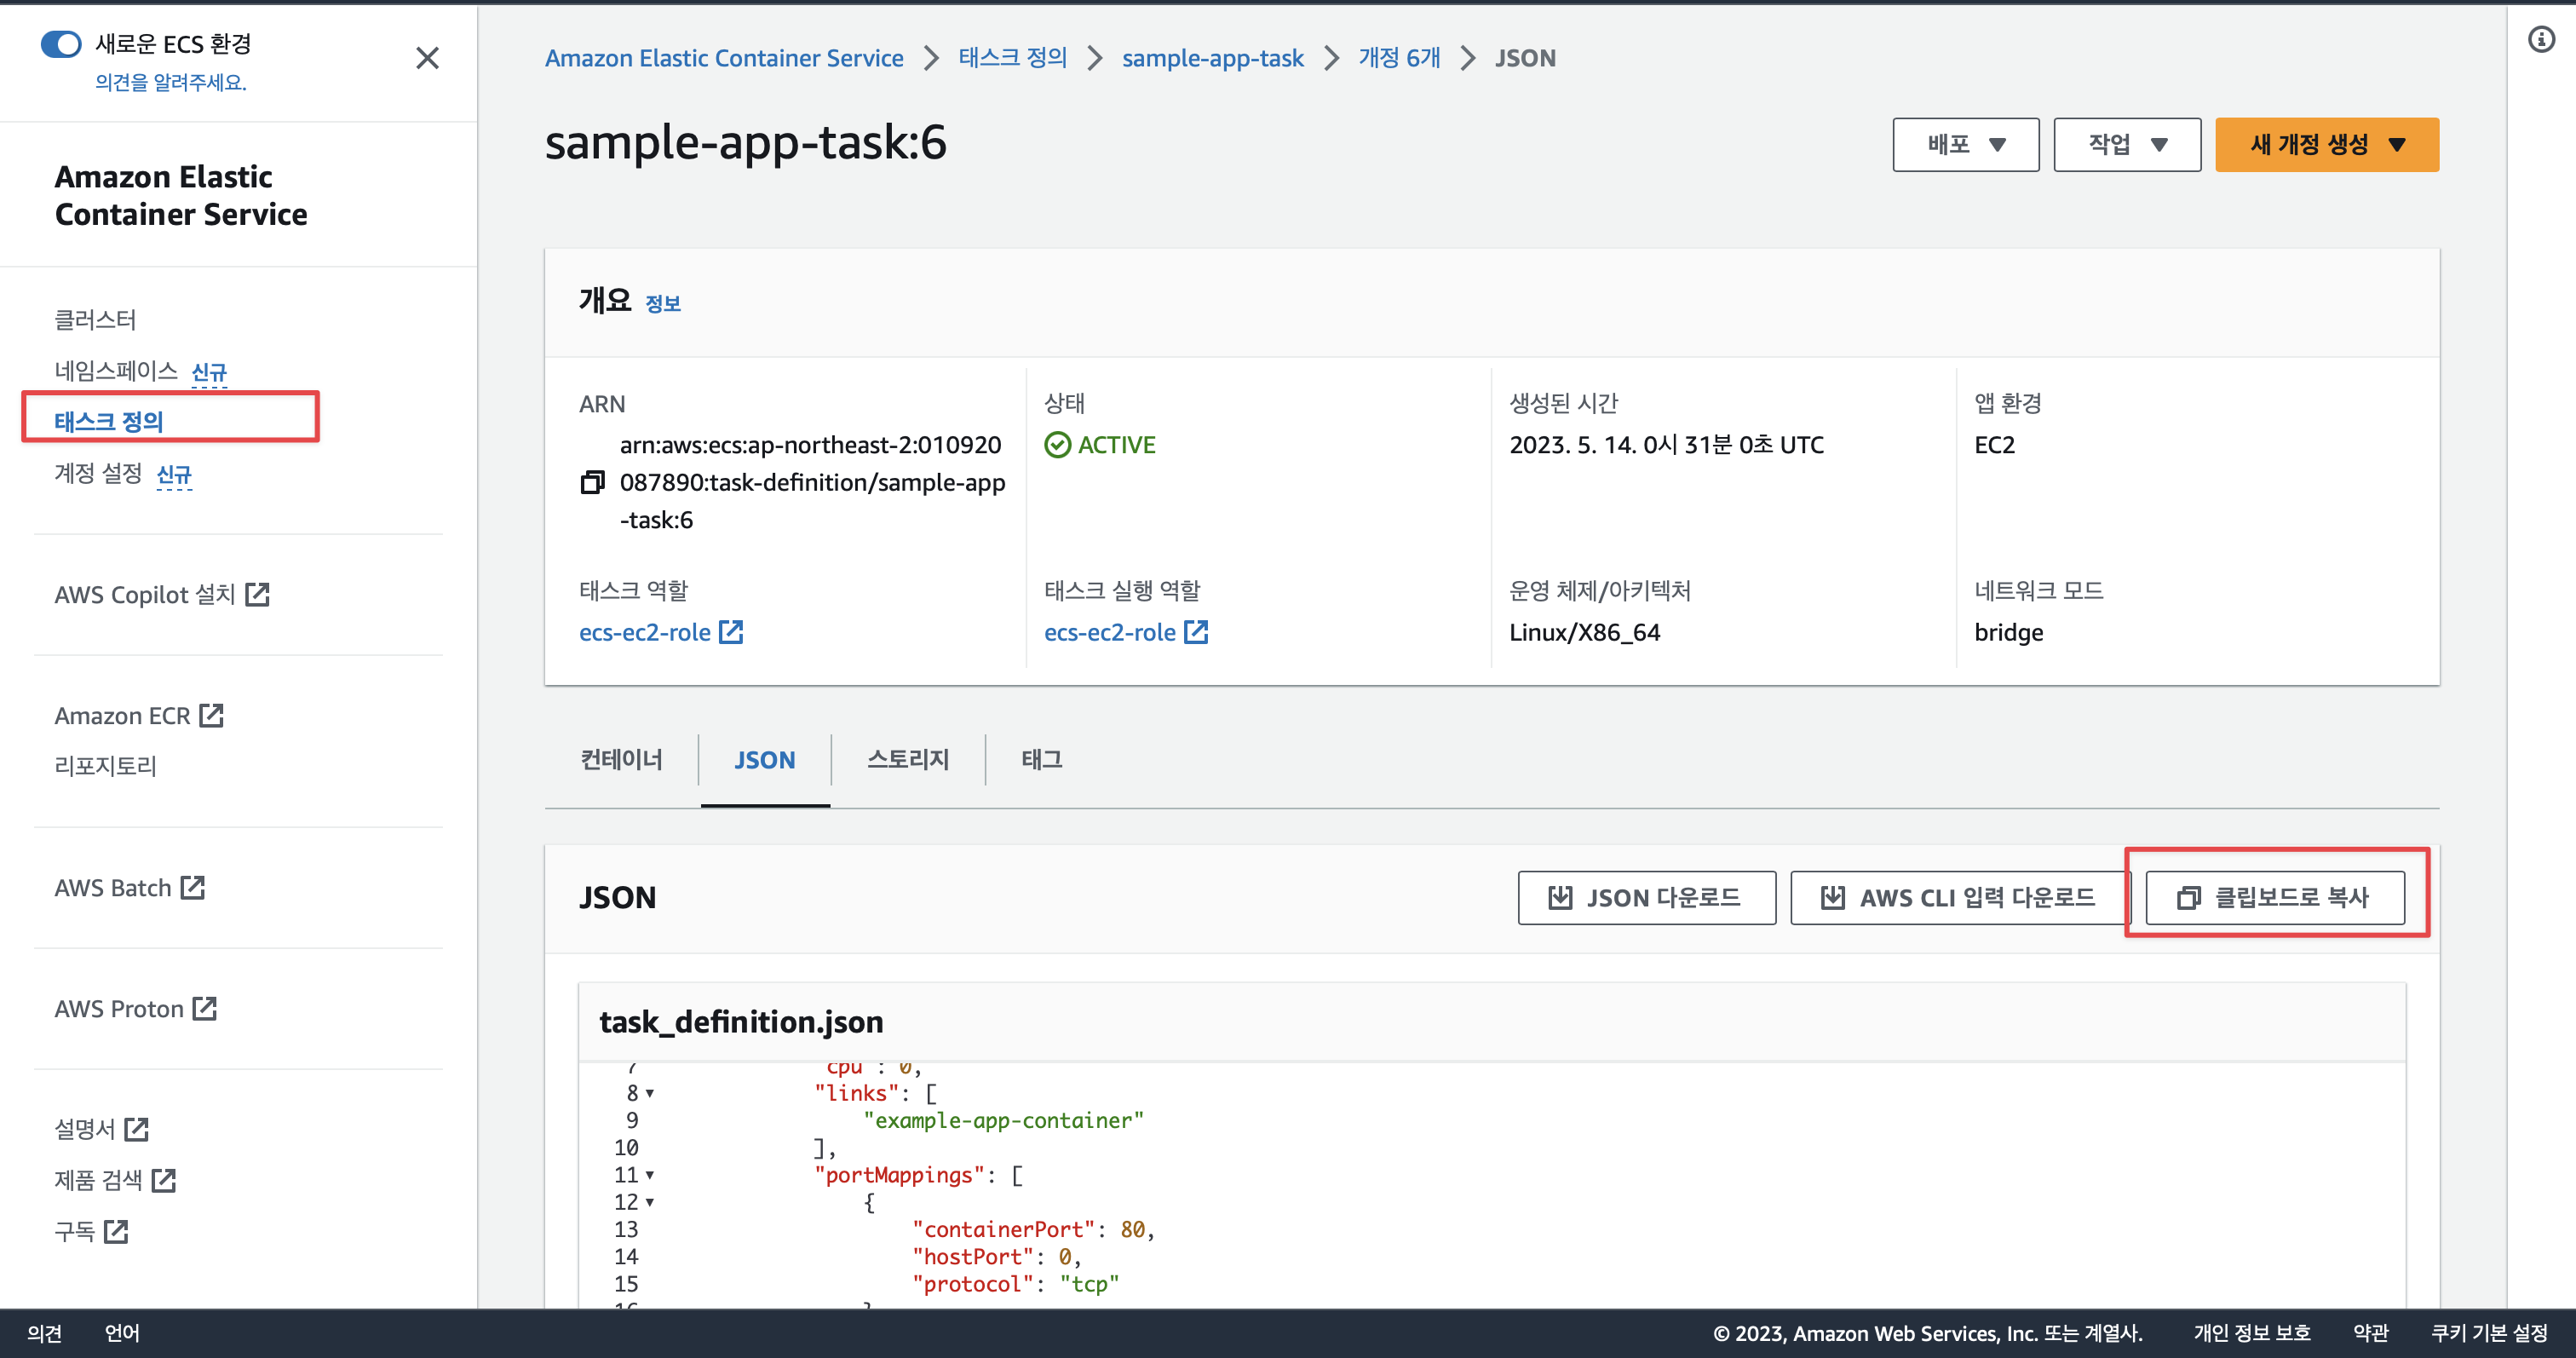
task-difinition json 파일 생성
프로젝트 루트 위치에 task-difinition json 파일을 생성합니다. 파일의 내용은 ECS의 작업 정의 내용을 복사하여 붙여넣기 하면 됩니다.
GitHub Actions yaml
Amazon ECS에서 실행되는 애플리케이션에 대한 CI/CD 작업을 지원하기 위해 AWS는 https://github.com/aws-actions 에서 다음과 같은 JavaScript 기반 GitHub Actions을 오픈 소스로 제공하고 있습니다.
- github.com/aws-actions/configure-aws-credentials – GitHub Actions에서 사용할 AWS 자격 증명 및 지역 환경 변수 구성
- github.com/aws-actions/amazon-ecr-login – 로컬 Docker 클라이언트를 하나 이상의 Amazon Elastic Container Registry(ECR) 레지스트리에 로그인
- github.com/aws-actions/amazon-Amazon ECS-render-task-definition – 컨테이너 이미지 URI를 Amazon ECS 작업 정의 JSON 파일에 삽입
- github.com/aws-actions/amazon-Amazon ECS-deploy-task-definition – Amazon ECS 작업 정의를 등록하고 Amazon ECS 서비스에 배포
참고 : aws-actions/amazon-ecs-deploy-task-definition
/ecs-example/.github $tree -a -L 2
.
└── workflows
    └── aws.yaml

2 directories, 1 file
name: Deploy to Amazon ECS

on:
  # Trigger the workflow on push or pull request,
  # but only for the main branch
  push:
    branches:
      - main

jobs:
  deploy:
    name: Deploy
    runs-on: ubuntu-latest

    steps:
      - name: Checkout
        uses: actions/checkout@v2

      - name: Configure AWS credentials
        uses: aws-actions/configure-aws-credentials@v1
        with:
          aws-access-key-id: $
          aws-secret-access-key: $
          aws-region: ap-northeast-2

      - name: Login to Amazon ECR
        id: login-ecr
        uses: aws-actions/amazon-ecr-login@v1

      - name: Build, tag, and push image to Amazon ECR
        id: build-image
        env:
          ECR_REGISTRY: $
          ECR_REPOSITORY: sample-app
          IMAGE_TAG: latest
        run: |
          echo $
          # Build a docker container and
          # push it to ECR so that it can
          # be deployed to ECS.
          docker-compose build
          docker-compose push
          echo "::set-output name=image::$ECR_REGISTRY/$ECR_REPOSITORY:$IMAGE_TAG"

      - name: Render Amazon ECS task definition for mauve app container
        id: render-example-app-container
        uses: aws-actions/amazon-ecs-render-task-definition@v1
        with:
          task-definition: task-definition.json
          container-name: example-app-container
          image: {aws_account_id}.dkr.ecr.ap-northeast-2.amazonaws.com/ecs-sample-app:latest

      - name: Modify Amazon ECS task definition with reverse proxy container
        id: render-reverse-proxy-container
        uses: aws-actions/amazon-ecs-render-task-definition@v1
        with:
          task-definition: $
          container-name: reverse-proxy-container
          image: {aws_account_id}.dkr.ecr.ap-northeast-2.amazonaws.com/reverse-proxy:latest

      - name: Deploy Amazon ECS task definition
        uses: aws-actions/amazon-ecs-deploy-task-definition@v1
        with:
          task-definition: $
          service: sample-app-service
          cluster: sample-app-cluster
          wait-for-service-stability: true
위 코드를 시각화하면 아래 이미지와 같습니다.
](/images/aws_ecs/Untitled%2090.png)
출처 : Create a CI/CD pipeline for Amazon ECS with GitHub Actions and AWS CodeBuild Tests
이번 예제에서는 docker-compose를 통해 컨테이너들을 빌드합니다. 따라서 github actions의 build-image 단계에서 docker compose build와 docker compose push 를 실행합니다.
- name: Build, tag, and push image to Amazon ECR
        id: build-image
        env:
          ECR_REGISTRY: $
          ECR_REPOSITORY: sample-app
          IMAGE_TAG: latest
        run: |
					# docker compsose에 정의된 각각의 서비스들의 image들에 선언된 ECR URI로 배포됩니다.
          docker-compose build
          docker-compose push
          echo "::set-output name=image::$ECR_REGISTRY/$ECR_REPOSITORY:$IMAGE_TAG"
그리고 다음 단계에선 빌드된 ECR 이미지들을 통해 task-definition.json 파일의 image tag를 업데이트합니다.
이미지 개수만큼 aws-actions/amazon-ecs-render-task-definition@v1 작업을 수행합니다. 그리고 첫번 째 작업에서 리포지토리의 task-definition.json을 선언하고 다음 단계부터는 이전 단계의 outputs를 그대로 사용합니다.
...
uses: aws-actions/amazon-ecs-render-task-definition@v1
  with:
# 이전 단계인 render-emerdy-app-container의 outputs의 task-definition 파일을 사용합니다.
    ask-definition: $
...
ender-task-definition 작업을 수행하고 나면 마지막 단계로 deploy-task-definition 작업을 수행합니다.
git push 실행 후 수정 확인
코드 commit 내용은 간단하게 수정했습니다.

이제 github repository로 push를 해보겠습니다.
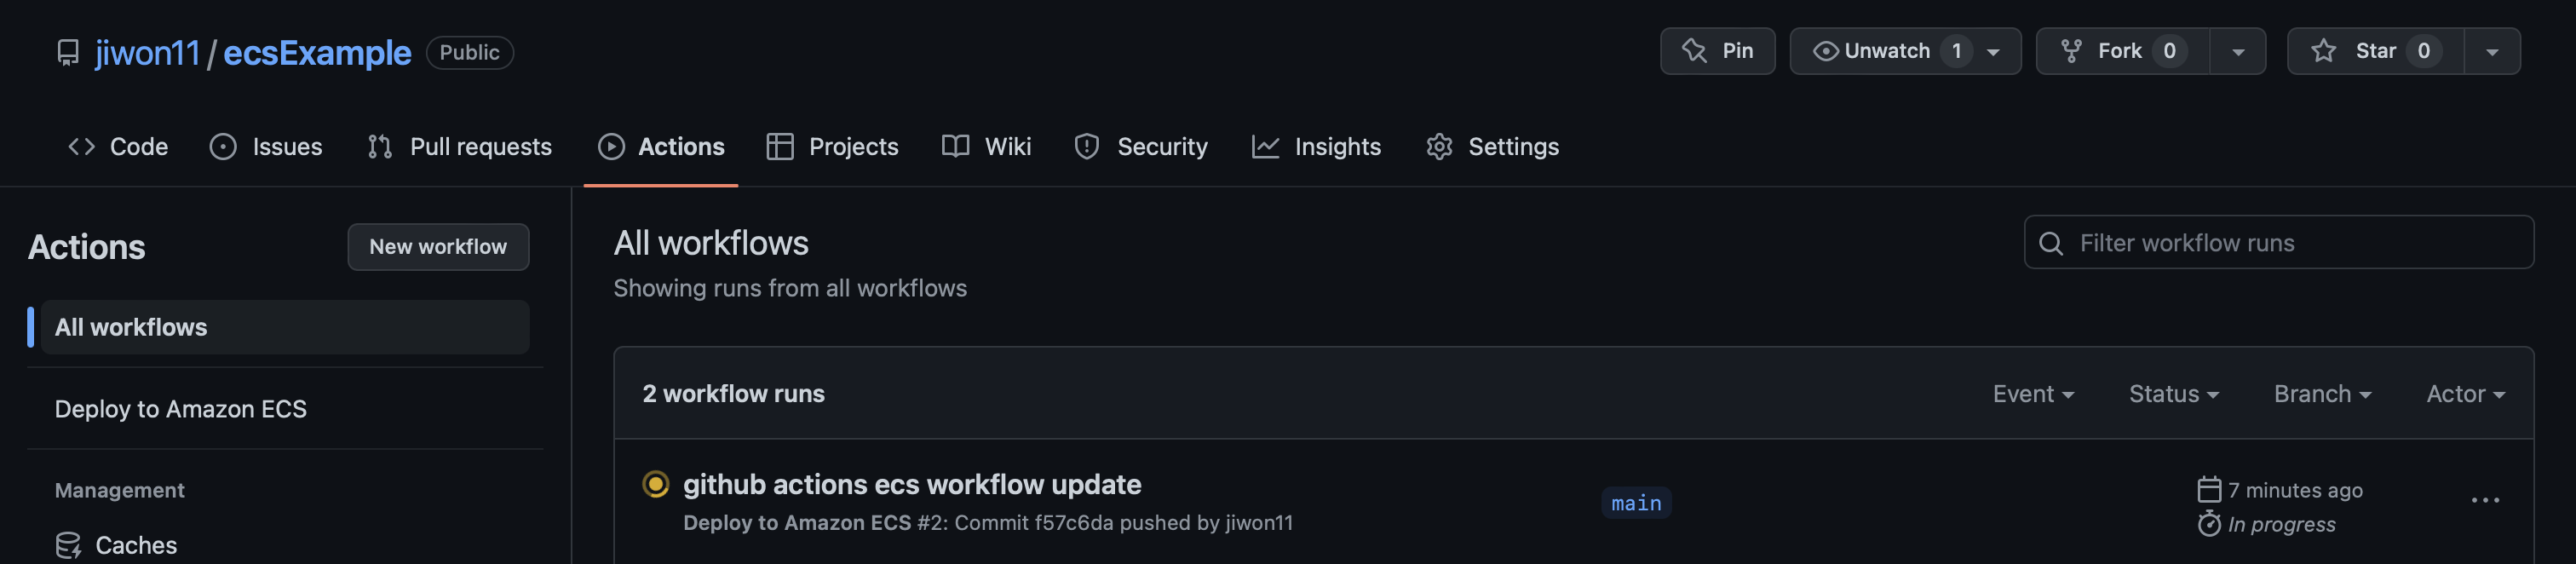
push가 완료되고 나면 actions가 실행되는 것을 확인할 수 있습니다.
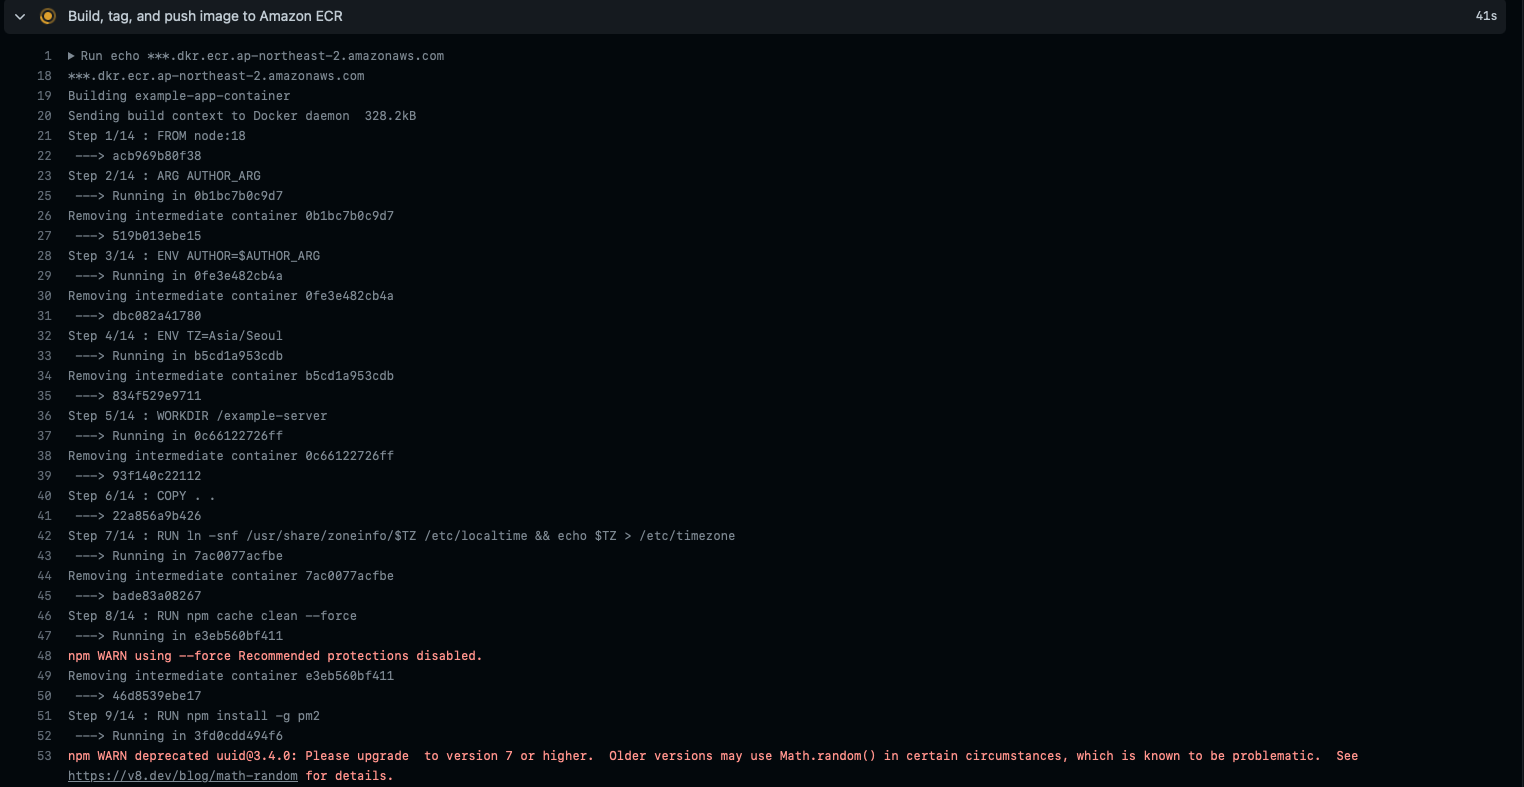
github actions의 호스트에서 docker compose에 정의된 대로 빌드되는 것을 확인할 수 있습니다.
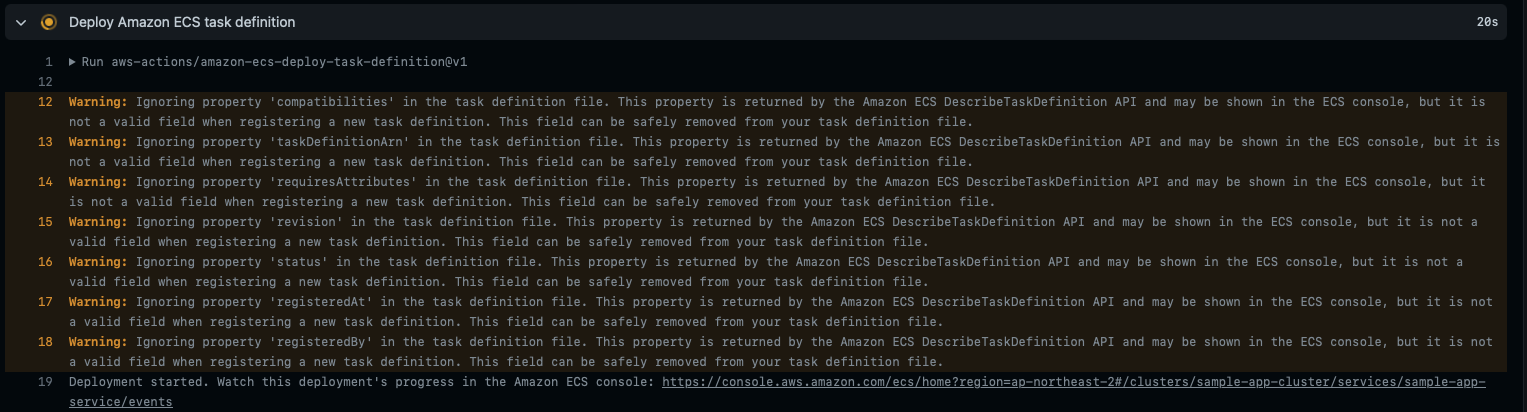
그리고 빌드가 완료되면 task가 업데이트되며 선언한 ecs 클러스터와 서비스가 업데이트됩니다.
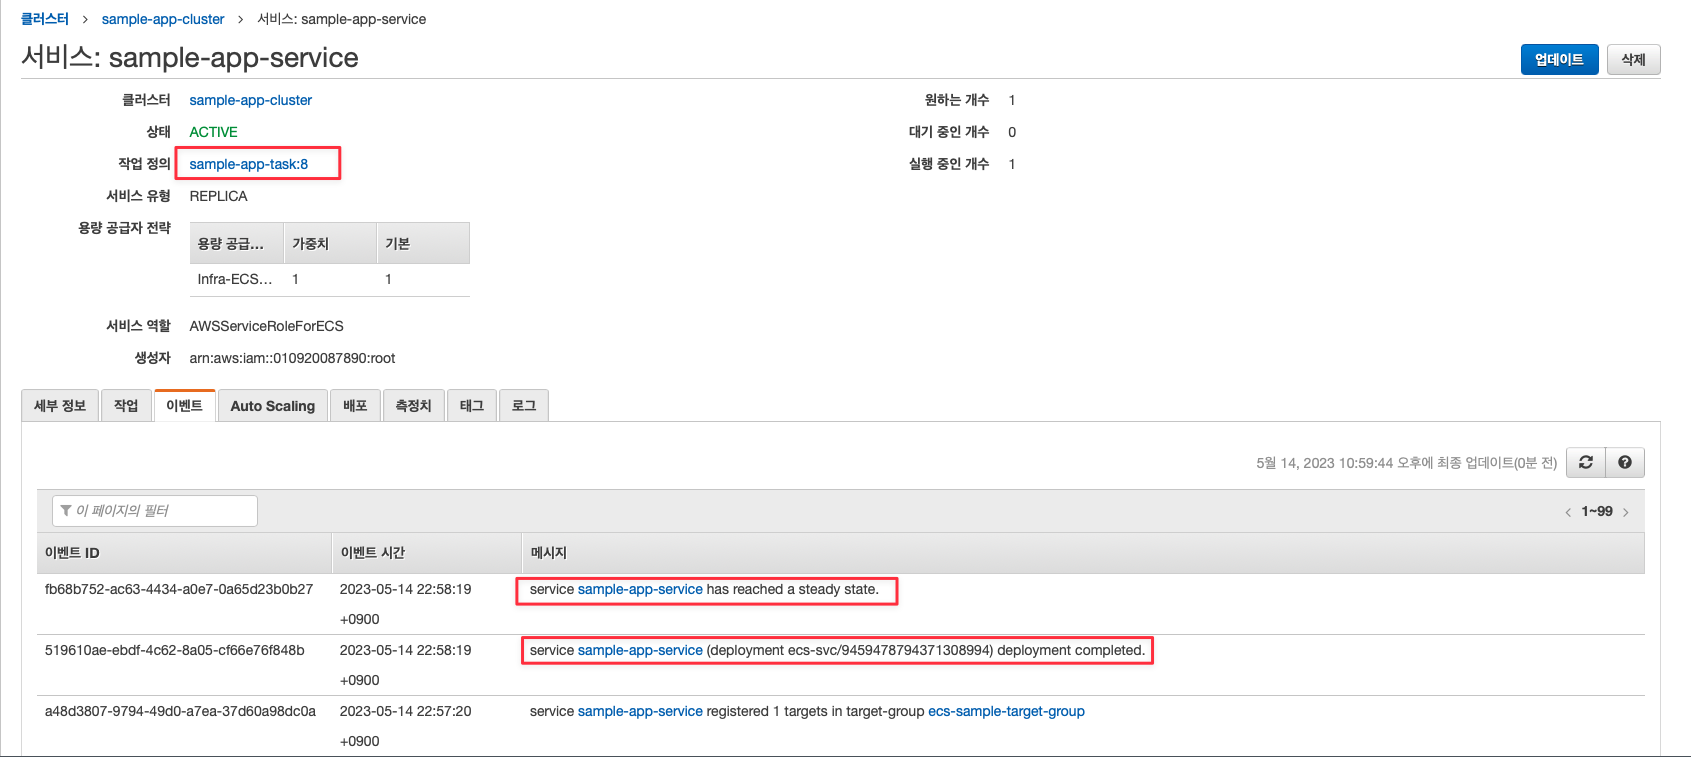
github actions 콘솔의 링크로 접속하여 기다리면 service deployment completed 되고 service has reached a steady state. 메시지로 배포가 완료됩니다.
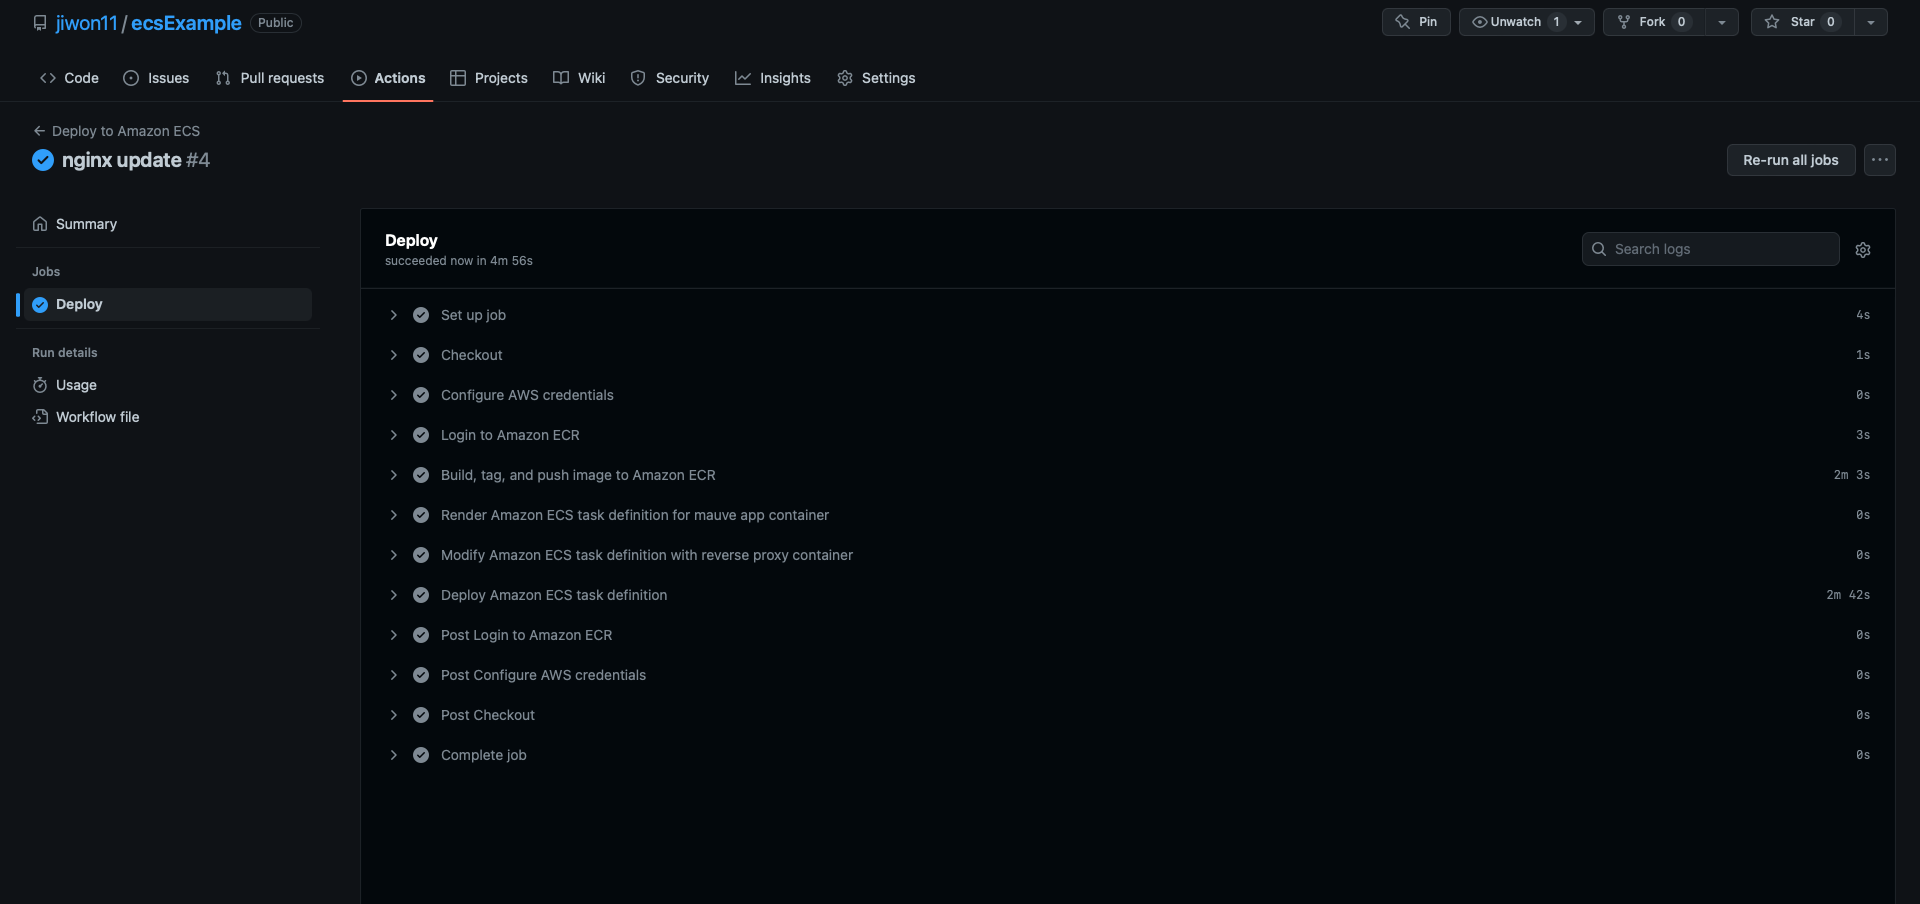
그리고 github action도 success되며 완료됩니다.
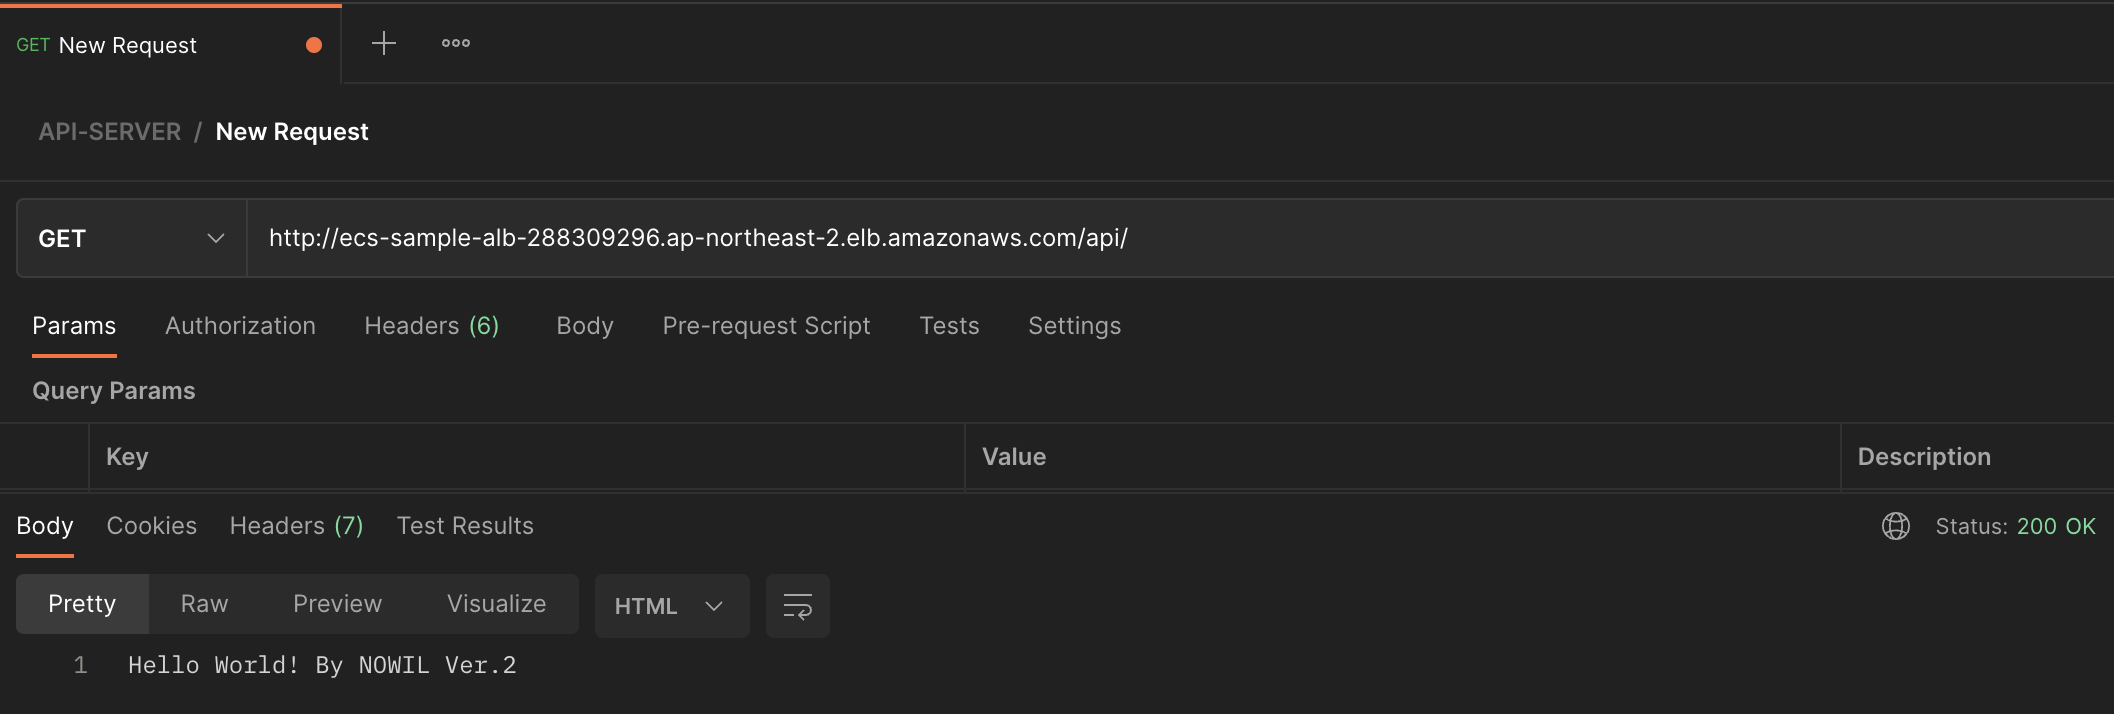
이전에 설정한 로드밸런서 DNS로 접속하면 정상적으로 commit한 내용이 반영된 것을 확인할 수 있습니다!
Epilogue
더 간편하게
우리는 3장에 걸쳐 AWS ECS를 통해 간단한 NestJS 컨테이너 어플리케이션을 배포하였습니다. 이 과정은 더 쉽게 컨테이너 어플리케이션을 배포, 관리, 스케일링해줍니다. 하지만 이러한 과정을 새로운 프로젝트 마다 해야 하는 건 그것 나름대로 많은 리소스를 사용해야 합니다.
이러한 문제를 해결하기 위해 나온 개념이 코드로서의 인프라스트럭처 (Infrastructure as Code, IaC)입니다. IaC는 코드로 인프라스트럭처를 관리한다는 개념으로 서비스마다 설정한 언어에서는 하시코프 설정 언어를 사용해 클라우드 리소스를 선언합니다. IaC의 대표적인 툴로 Terraform, pulumi 등이 있습니다.

이번 포스트에서는 IaC를 통한 클라우드 인프라스트럭처를 관리하는 내용은 다루지 않았습니다. 하지만 추후 포스트에서 지금까지 구성한 NestJS 컨테이너 어플리케이션을 IaC를 통해 관리하는 내용을 다루겠습니다. IaC에 관심이 있으신 분들은 아래 링크들을 참고해주세요! 🙇🏻